


Here’s an easy DIY project that’ll add some flare to your bookshelf. This bookish light box is perfect for any bibliophile and will add a whimsical glow to any room. Make one for yourself or give it as a gift. The supplies for this project are easy to find. So you can pick up what you’ll need at your local craft supply store. It won’t take days to build because it doesn’t need any fancy tools or measuring. So pick out your favorite bookish quote and light up your bookshelf with this stylish bookish light box.
In the name of full transparency, please be aware that this post contains affiliate links. Any purchases made through such links will result in a small commission for me (at no extra cost for you).
Bookish Light Box
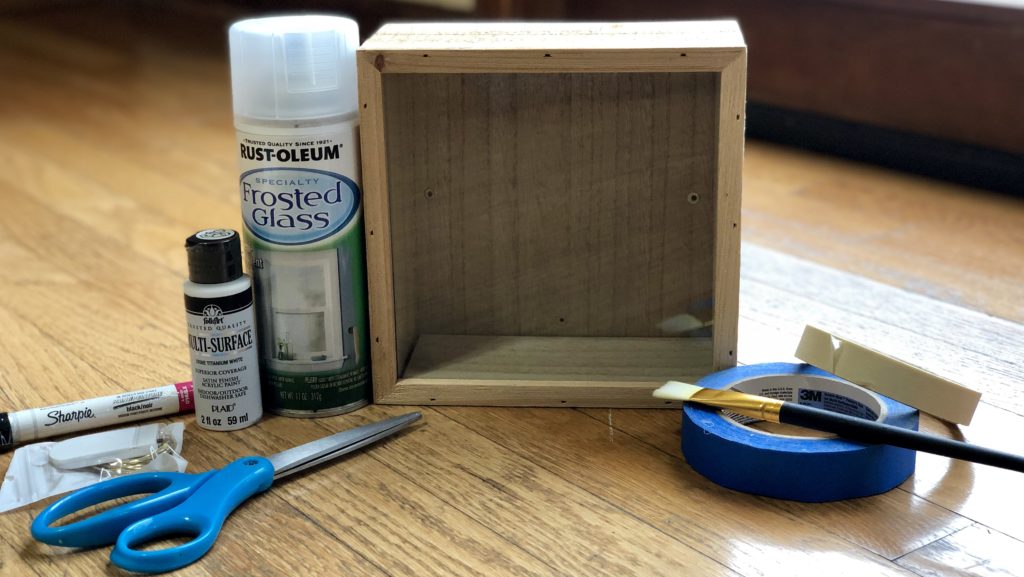
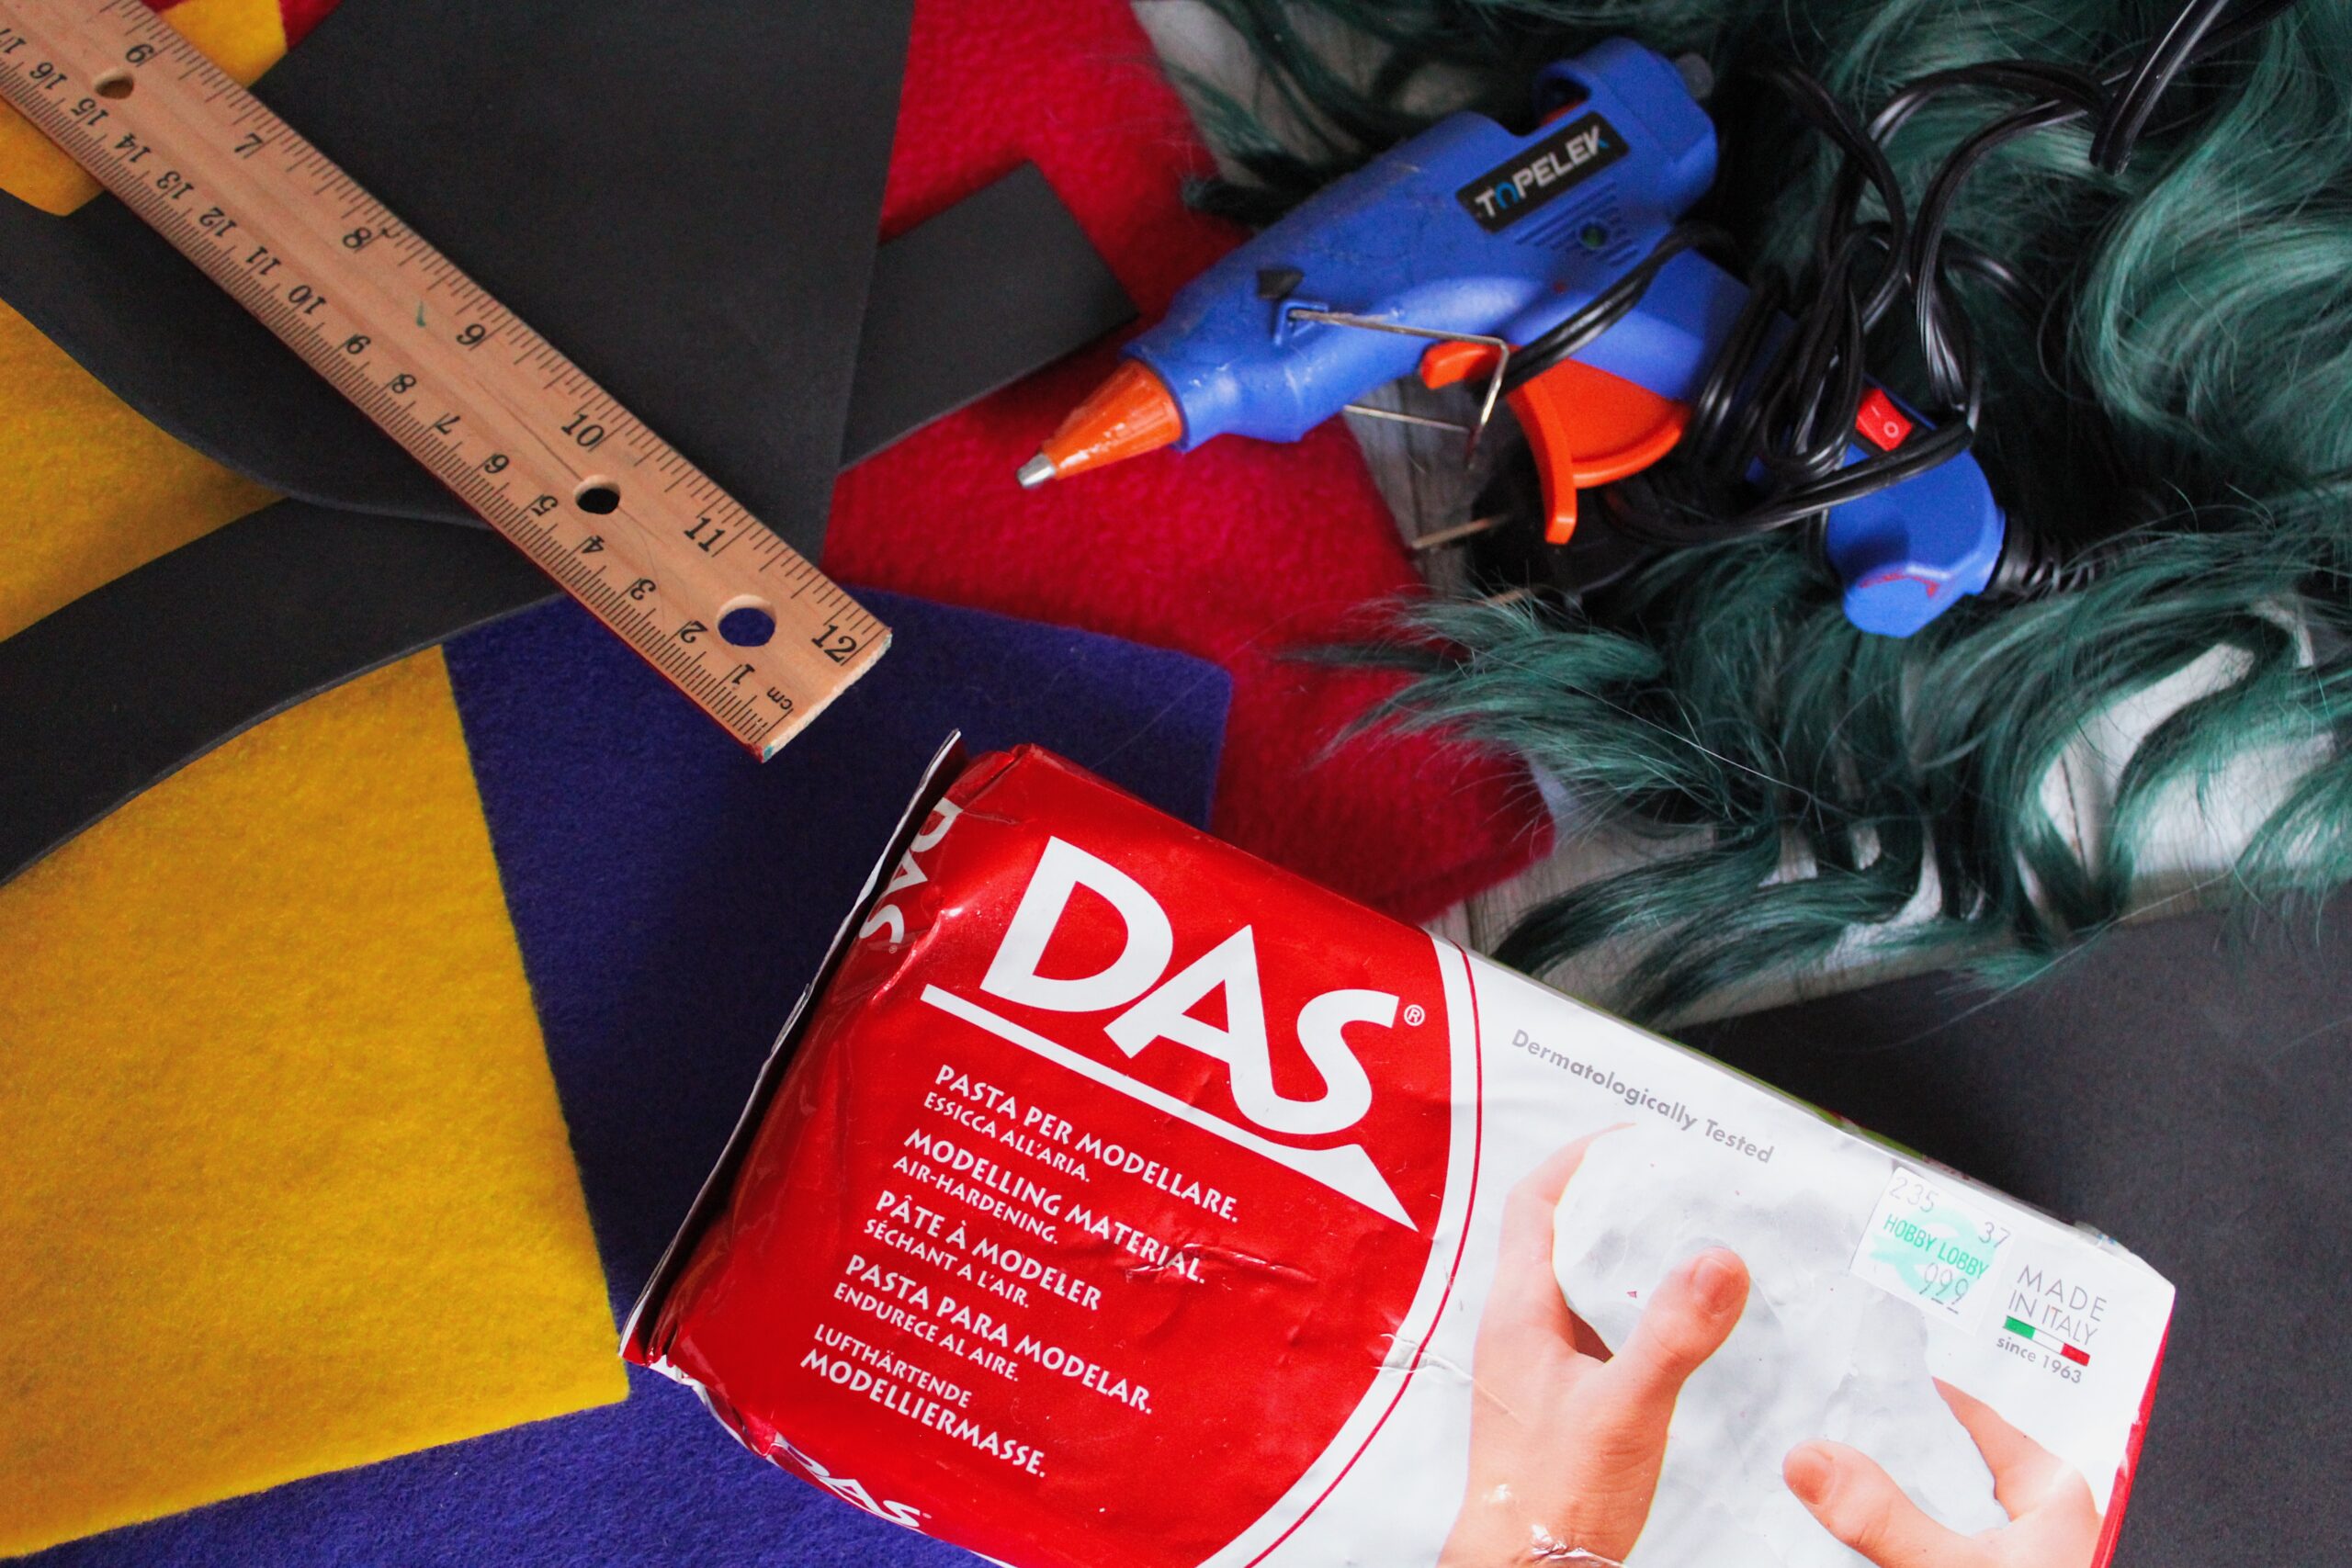
What you’ll need:
- Shadow Box
- Black paint marker
- Frosted glass spray
- Scissors
- Tape
- White paint
- Battery-powered twinkle lights
- Rubbing alcohol or glass cleaner
Instructions
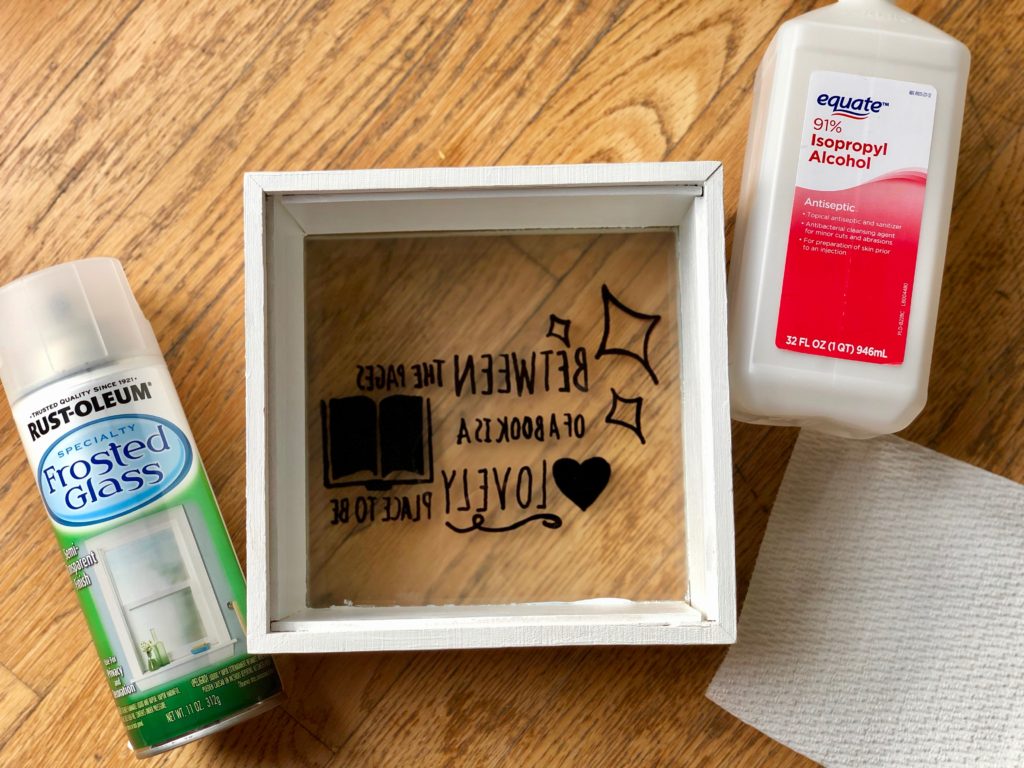
- First, paint the inside, outside, and back of the shadow box white and let dry. Once dry cut out the design you are using and place it on the inside of the shadowbox and tape it into place.
- Then use rubbing alcohol or window and a paper towel to clean the outside glass. Let dry.
- Once the glass is dry use your paint marker to trace the design to the front glass. Then set aside and let dry before adding another coat of paint.

- After your design has dried, remove the template taped to the box. Then clean the glass with rubbing alcohol or glass cleaner. Let dry.
- Next, evenly use frosted glass spray to coat the inside with 2-3 coats of paint. Then set aside and let dry for an hour.
- While it dries you can begin adding the twinkle lights to the back of your box. Start with lining the lights on the back row by row. Then use tape to strand the lights in place. Try to place the lights evenly across the backing, so the light effect is equally spread throughout the shadow box when the lights are lit. Then tape the end of the lights to the back of the box so you can’t see it, and it’ll be easier to turn on and off.
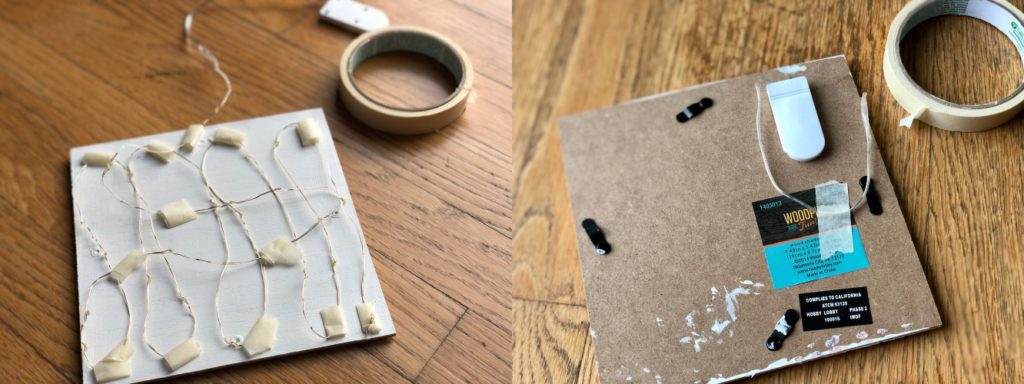
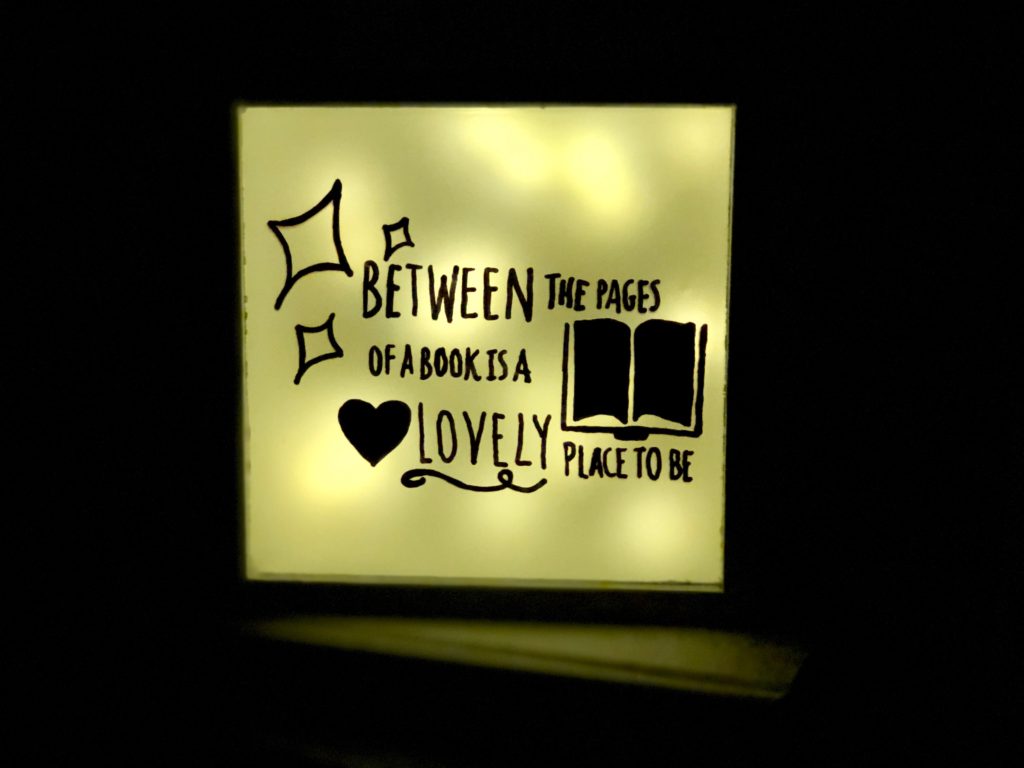
- Lastly, add the back with the lights to box, secures it with the frame brackets, and light it up.
Notes:
- If you don’t have tape for the lights. Hot glue would work too long as it’s on a low setting.
- Use a painters marker, not a sharpie. The sharpie won’t appear as dark when the lights are lit.
- If you make a mistake with the paint marker. Use acetone fingernail polish remover and a Q-tip to remove it.
- For the design, you can use your favorite bookish quote, find a free printable, or design your own words. You can find the I used here.
Pin me!
Angela is the owner and chief content creator for Weird Louise and is working towards becoming a full-time blogger. In addition to blogging here on Weird Louise, she is an artist and owner of the Social Awkward Club. She also has a passion for helping others discover ways to live their best lives.


This lightbox is fantastic ??????
Thank you! 😀
What a neat project. I need to make one of these for my bookshelves, but first I need to figure out what quote to use.
Thank you! There are some many great quotes to choose that it took me a while to decide on that one.
I love this idea! Definitely a new project for me this summer!
I’m glad you like it. And it is a great summer project especially since you have to use spray paint.